Getting Ready for a Core Vocabulary Journey

Summer is a great time to prepare materials for the busy year ahead. Next week, we launch a new series, Make It Monday, to help you do just that. We’ll focus on creating one thing at a time so that you’re ready to start the school year with an ample supply of core vocabulary resources that you can use in therapy, instruction, and informal conversation. Later in the series, we’ll be making individual and classroom communication boards and instructional materials. For now, though, we’ll spend some time getting organized and prepared.
Before you make the investment of time and resources, it helps to make a few key clinical/educational decisions. This will keep us from wasting color ink, laminating pouches, velcro, and, most of all, time. Here are the things to think about before you begin.
Symbols
In order to make AAC materials, you’ll need to decide on how language is represented to the learner. Selecting the symbol set or system that we use in our materials is a decision we don’t take lightly. If you are working with learners who all use the same symbols, then this task is an easy one. If not, then our task is a little more complicated. The same holds true if there is little or no AAC already available to the students. In these cases, we can move forward by asking ourselves some questions, like:
- What symbols do MOST of them use? Think both about any AAC technology and manual communication boards.
- What symbols (if any) are used in visual supports in the classroom, home, or therapy environments? Do the students seem to know what those symbols mean?
- Is another service provider using symbols with my student? If so, which kind of symbols?
Another important question to consider requires a bit of imagination: If all goes well and the students are successful, where are we headed next? Usually, we try to get kids on AAC technology with robust core vocabulary as soon as possible. Think about the AAC apps and SGDs that seem most appropriate for these students. I’m not saying we would make a decision at this point, of course, but it is really important to consider this before we make materials. Here’s why: We don’t want to spend months teaching the students to understand and use one set of symbols in their core vocabulary materials only to switch them to a device or app that uses something completely different later on. Occasionally, that’s unavoidable, but in most cases, we can look ahead and avoid this unfortunate scenario.
Not sure where your students are headed when technology enters the picture? Take your best guess. Most of the popular AAC apps and SGDs use SymbolStix or PCS, both of which are used in popular programs that our students may already be using (e.g., Literacy Lab, News2You, Unique Learning System, Boardmaker Expedition Education, Boardmaker Book Bridge). Reflect on which, if any, your students already use or are likely to interact with in the future.
One other note before we move on: I’m not suggesting that it is important to start with ‘no tech’ before we introduce a robust core vocabulary app or SGD. In most cases, the sooner we introduce that kind of AAC technology, the better our kids do. However, in a prAACtical sense, it is often the case that the adults who are most involved in the intervention – SLPs, teachers, parents – need some time to adjust to AAC practices before they feel comfortable integrating the technology. If you have the option of starting with AAC technology, go for it! If you think the team (not the kids) will be overwhelmed and fail to consistently implement AAC, then slow down. Starting with no tech may be the best way to move everyone forward. AAC technology can always be integrated at a future point in time.
“But I don’t have the means to get the symbols I want to use. Now what?”
You’re not alone. Many families, educators, and therapists have limited or no access to the AAC symbols that make the most sense for their learners. What’s a person to do?!
- Start with pre-made materials already available for free online. If you hunt, you can find a lot of these symbols already posted on a PDF of communication or instructional materials. It will take extra time and effort to find the symbols you need and save them to a format that you can access to make materials, Watch out for copyright violations, though. We all want to live in a world where the rights of others, including authors, illustrators, and companies, are respected.
- Use free online tools. Some SGD manufacturers have software and other free downloads that can be used to create communication materials. PRC, for example, offers both its PASS software (to emulate SGDs) and the icons used in their AAC devices (click here to access those). Saltillo’s Chat Editor, which used to be fee-based, is now free. In addition to it’s main purpose (emulating the software on NovaChat SGDs so that we can explore and program without taking the device away from the student), the ‘capture’ feature makes it a terrific resource for making manual communication boards and other materials. It takes a little time to install and get familiar with it, but you’ll get some great payback from your effort later on.
- Work with what you have. If you already have access to a set of symbols that is different from the one that would be best for your students, you can use that for a period of time. It’s not a great solution, and it’s not a long-term solution. As a temporary fix, however, it is better than doing nothing at all.
- Develop a long-range plan for getting what you need to serve your students well. Advocate with your administrators, develop a wish list that others can contribute to, or consider crowdfunding through sites like Donors Choose.
Note: Don’t get stuck in analysis paralysis. If you feel overwhelmed by this decision, my best suggestion is this: Pick one. Go with your best informed guess of what will help your students be successful. It’s better to start with something that is less-than-ideal, then get stuck in that anxiety-producing loop of not knowing which is the ‘best’ symbol to go with.
Supplies
Now it’s time to assemble your supplies. Make sure you have enough color ink, laminate material, velcro, and file folders. If you’re missing any of that, don’t worry you can create and organize the materials digitally for now, then print, laminate, and assemble later on.
Basic Supply Suggestions: Color ink, laminating pouches, paper (if possible, card stock or a heavier bond), adhesive velcro, file folders
Optional Supplies: Binder rings, lanyards, coil keychains, retractable keychains or badge holders

These are great for keeping the AAC materials on the person, and that helps with the 3 second rule (“If you can’t put your hands on it within 3 seconds, you probably won’t use it.”). We use them for all staff and for some of the students, too.
You’ll also need things like scissors, cutting mat, exacto knife, and a hole puncher. I also recommend a simple corner punch, found in craft supply stores, to round off the sharp points of laminated material. Getting stuck by a piece of laminated paper may not seem like a big deal, but if it happens to your student, it may be just the thing to put him off. It’s worth a few dollars and this extra step to avoid that potential problem, in my humble opinion.
Digital Organization
The best time to organize files and materials for a project is right at the start.
- Folders: Take the time to set up a folder or two on your computer to store the materials so that you can find them quickly and efficiently.
- Files: Develop some sort of strategy for how you will name and label your digital files. It can be helpful to include things like type of material, symbol, intended audience, and date. You can do this in any way that makes sense to you, but the idea is to establish a convention and follow that so that you can easily locate materials later in the year when life gets more hectic. For example, the first core board with SymbolStix that I use for my beginning communicators in a preschool classroom might have a file name of Prek core 60 SS Easy 070516. As we progress through the year, I would fill in some of the spaces on the board and move them to the board labeled as Prek core 60 SS Medium 070516. Bottom line: Create a system that makes sense to you and do your best to follow it as you make these AAC and support materials.
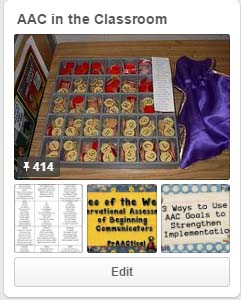
- Curation Sites: It can also help to use online venues like Pinterest and Diigo to collect digital materials that you find on the internet. These can be things that only you use or see, or you can invite collaborators, such as other team members.
Time spent preparing materials can make our lives easier and less stressful. Most importantly, the preparation we do in advance, improves the chances that our students will have access to the AAC materials they need. Next week, we’ll start preparing individual core materials. See you on Make It Monday!
Filed under: Featured Posts, PrAACtical Thinking
Tagged With: core vocabulary
This post was written by Carole Zangari





7 Comments
Corner punch :where have you been all my life?!
Haha! I know just what you mean, Armen.
Seriously! Small but important tip! I once made personal core boards for a program and later got a call from the SLP. She’d had a board thrown at her by an upset child and the sharp laminate left a small cut on her face. ? Lesson learned! Thanks for all these great tips, Dr. Z!
Looking forward to Make It Monday. Will it be a part of this post or do I need to sign up for it somewhere else? I don’t want to miss it.
Thanks for that comment, Paula. These are regular posts, so you should get them in your inbox if you are subscribed, or just by visiting the blog. Hope you enjoy the series. 🙂
The ARASAAC symbol set is free.
Thanks for mentioning that, Ettina! They have a wonderful selection of symbols and I don’t think enough people in my area know about the site. Glad you stopped by to comment!