How I Do It: The All-in-One-Visual-Support Tool by Tabi Jones-Wohleber
I am constantly in awe of the creativity and generosity of AAC practitioners, particularly those like Tabi Jones-Wohleber who make fabulous materials and share them with colleagues that they’ve  never even met. Tabi is an SLP on the AT Team for Frederick County Public Schools in Maryland. A graduate of Penn State University, her career has focused on AAC. Though she works with many schools and addresses a variety of AT needs, most of her time and creative energy is devoted to working with students with the most significant disabilities. In this post, she introduces us to the All-in-One-Visual-Support Tool. You wont want to miss Tabi’s treasure trove of prAACtical materials.
::::::::::::::::::::::::::::::::::::::::::::::::::::::::::::::::::::::::::::::::::::
It was a conversation I’d had many times before. A conversation that kept resurfacing in one form or another. It’s the conversation of how to manage all the stuff; all the visuals, all the reinforcers, all the communication tools. The benefit of visual supports to help student engage, complete tasks, transition, etc, is well understood. But there is only so much room at the table (literally, on the table) for all those tools. And who keeps track of where the First/Then board was left anyway. It was from just such a conversation that this nifty little book came to fruition. Recognizing that frustration with all the stuff sat in place of motivation to use all the stuff because the big question “How do I manage all the stuff” had left a heap of boards, books and visual symbols piled high, but too cumbersome to use.
On went my engineering hat. A host of prototypes ensued, and the All-in-One-Visual-Support Tool evolved. With consideration for some of the most frequently recommended visual supports in mind, this small 5 ½ x 8” binder includes a First/Then board, a Personal Picture Schedule, and a Task Analysis Checklist, with a Finished Pocket on the front cover. Each of these is easily available by flipping or opening the folded board which is adhered to the Finished Pocket. A Token Reward board is on the back cover. The picture symbols and tokens for all these tools are housed inside the binder on plastic tabbed dividers covered in adhesive carpet tiles.
To be clear, this is not a communication tool, but a compilation of visual support to facilitate participation, transitions, and increased independence with task completion.
- First/Then Board: A visual explanation that completion of an undesired activity will result in the opportunity to participate in a preferred activity.
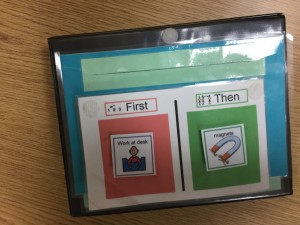
- Personal Picture Schedule: A manipulable visual representation of what to expect throughout the day. An added benefit is that when schedule changes occur, this tool provides a concrete representation of that change. This can facilitate a student’s flexibility and willingness to adjust to the change.
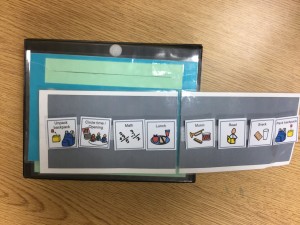
- Task Analysis Checklist: A strategy for increasing student independence with task completion by breaking into manageable parts or steps. Consider which components of a task as student completes unsupported to determine which steps to target. Even presumably inherent steps of a task such as “write your name” or “turn in your work” could be included.
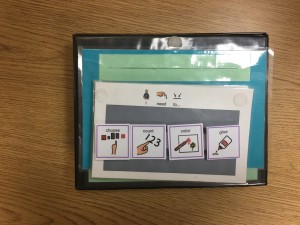
- Finished Pocket: A manipulative that represents completion by actively “getting rid” of finished tasks or activities.
- Token Reward Board: An incentive to shape desired behaviors by helping a student learn to manage/self-monitor his/her behavior. Visual cues are provided for desired positive behaviors, and reinforced with tokens. Considerations should include the number of tokens earned, and frequency of reinforcement. These may be increased over time as the student demonstrates success with this tool. Tokens are stored on a Velcro® strip inside the back cover.
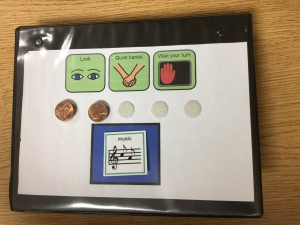
- Storage Pages: The inside pages are durable plastic tabbed dividers covered with adhesive carpet tiles (available on Amazon). Velcro® strips could also work.
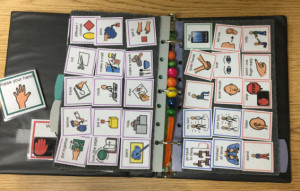
- Extras: I’ve expanded my book with some additional visual supports that fit nicely on the inside pocket or in the cover sleeve. These include the following:
- A “focus finder” that can be used to either highlight important information by blocking out peripheral information or it can be used to indicate a student response, in lieu of pointing.
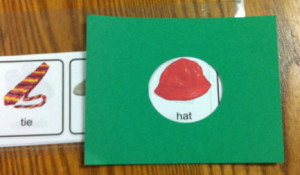
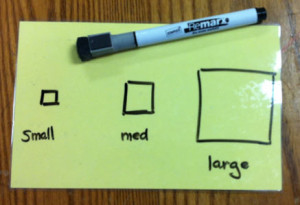
- A mini whiteboard, aka: large laminated index card and dry erase marker, for “on the fly” visual supports.
- A “Wait” card to teach a student to wait for a requested or anticipated activity or item. This will help him/her to learn that it is not “Unavailable”, but rather “Not available yet.”
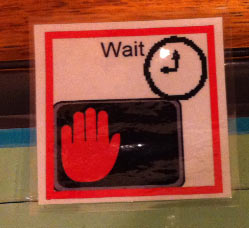
- A “focus finder” that can be used to either highlight important information by blocking out peripheral information or it can be used to indicate a student response, in lieu of pointing.
In our district these books have been developed for individual students who benefit from many or all of these supports, as well as for teachers who use one or more components with multiple students at a time, or across the school day. Templates for generic vocabulary were created to provide teachers a place to start, but once in place many of the picture symbols are customized to meet the needs of individual students or classrooms.
Make your own All-in-One Visual Support Tool by downloading the packet of materials here. It includes:
- Instructions for assembly
- The Visual Supports Template for the front cover. Be sure to change your printer settings (and paper) to legal-size paper.
- You will want to customize the picture symbols to meet the need of your student(s) and/or environment. But there are some samples to get you started.

Filed under: PrAACtical Thinking
Tagged With: classroom, resources, schools, Tabi Jones-Wohleber, visual supports
This post was written by Carole Zangari

11 Comments
I’ve seen this beautifully comprehensive tool at work at a school for students with significant disabilities. Not only does it provide the supports for every possible wrinkle in the classroom day but it also teaches and reinforces the need for visual modalities to new and veteran teachers. If I were a practitioner stuck on a desert island with my students, the “All in One” would be my AAC tool of choice.
Thank you for that very generous comment Joanne. One of the things I learn again and again is that figuring out the ‘What to do” is only part of the solution. Figuring out the “HOW TO” is often the bigger challenge.
Tabi this is so cool! You’re famous! Also love this idea…pinning!
No surprise here! I have had the privilege of working with Tabi for several years and witnessing the positive results of her efforts for students and staff. There is no quit in her determination to find and effective way to facilitate communication for our most severely disabled students and get others on board.
I keep coming back to your blog because I never know what goodies I will see next. It is chock full of ‘practical’ AAC information. I can’t thank you enough for sharing all of your knowledge and giving us access to your materials. I want to be you when I grow up! Thank you!!!
Thank you so much for sharing all your wonderful ideas with everyone, This will be so helpful to the sped teachers that I work with.
I’m glad you find it useful!!
This is amazing ! Thanks so much for sharing Tabi!
Thanks Nic!
Any suggestions on where to find the 5/5 X 8 binders at a reasonable price? Would love to do this as a make & take activity for teachers but can’t find the binders for less than $3.00.
Thank you so much! This is wonderful and I appreciate you sharing your knowledge and expertise.