Let’s Play! Using Switch-accessible iPad Games for AAC Learning

 If you’ve been planning to begin using switch-accessible iPad games in your AAC work but haven’t quite gotten it all figured out, this post is for you. We’re delighted to introduce PrAACtical AAC readers to Daniel Rigney, an SLP who with students who have complex communication needs at the Rosedale School in Austin, Texas. Daniel’s professional interests include the AT/AAC Maker Movement (see this post for info on that topic), language development for students with moderate to severe disabilities, and disability rights. He also maintains a YouTube channel, Assistive Technology ATX, with helpful AT content and tips. In this post, Daniel shares the process he uses for integrating iPad games into AAC therapy for students who use switches rather than direct selection.
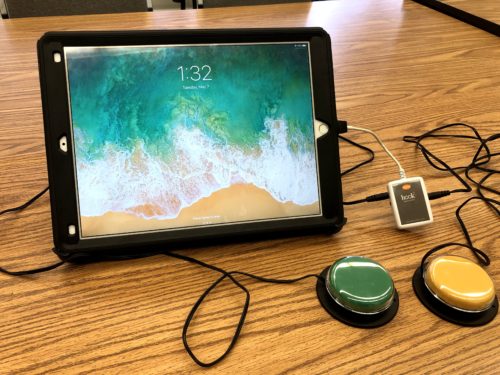
::::::::::::::::::::::::::::::::::::::::::::::::::::::::::::::::::::::::::::::::::::::::::::::::::::
Let’s Play! Using Switch-accessible iPad Games for AAC Learning
iPad games can be a great teaching tool for core vocabulary. From having your angry birds “go” to choosing a “different” outfit for your character, iPad games can tap into the powerful motivation that technology can bring.
However, for AAC users that have limited gross or fine motor control and rely on switches for a lot of interaction, access to these apps can be difficult. There are a few apps and games designed for switch use, but not enough to cover many of the core words, much less align with students’ interests.
This post will discuss how to search for iPad apps and games that can be used for core word instruction. We will also look at analyzing which apps can best be adapted for switch use. Finally, we’ll look at how to set up switch access. Setting up switch access can be a complex process, but once you do it a few times, it’s pretty straight forward.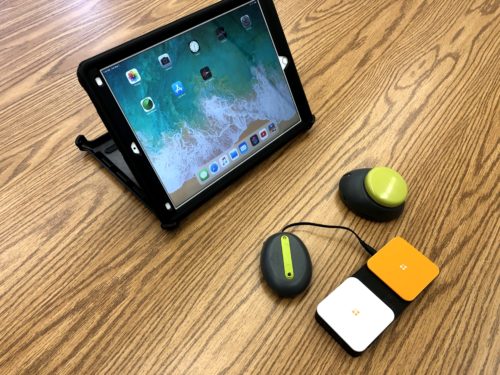
Searching for Apps
First, you want to find games that can be related to the core word you are working on. Figuring out the search terms will be the key. You can start out with the core word itself, for example, “go.” Every once-in-awhile, this strategy will work, however, you might need to use creative thinking to get more results. For example, if your core word is “go” you might try some synonyms like “launch,” “fly,” or “move.” Additionally, you might try some words that relate, like “race” or “escape.” Finally, you can use your knowledge of the student’s interests to refine your search. Perhaps a student likes boats, you can try “boat race.”
Let’s look at another core word that might be more difficult to search for: “on.” Searching with the core word only is unlikely to produce any meaningful results. The synonym “above” or “on top” might have a few more. However related activities might be the best source of hits: “climb,” “jump,” and “scale.” Finally put in some of the student’s interests and you could try “mountain climb.” Searching for this, and there are plenty of results that could be used to model the word “on.”
A word about paying for apps: typically, games will come with a free trial version. Sometimes this is enough to use it with a student. Almost always it is enough to see if it will be adaptable for a student. I usually try to keep it free, but sometimes will pay up to $1 for access to the app. If an app will work for a lot of students over a longer period of time, I pay up to $5. Any more than that, and the app should not only be perfect but serve me a cup of coffee.
Deciding Which Ones Can Be Used with Switches
The iPad is marvelous in that almost all interactions with it can be done by just touching a place on the screen. We’ll call these “touch points” for the purposes of this post. iOS accessibility features allow us to use a switch to mimic a “touch point.” Some of them are pre-installed, like “touch the middle of the screen” or “touch left/right side of the screen.” We can also make our own using something called “custom gestures.”
The key to deciding if and how a game can be adapted is to determine the number and type of “touch points” that the app requires for interaction. If you can interact with the game using only 1-2 touch points, then that will be easier to adapt. Although I’ve done up to 6 switches at a time, it is complex and I do not recommend it when starting out. Similarly, are the touch points variable? I.e. do they move as you advance through the game? If so, then we might want to consider how it can be simplified or not use the game altogether.
Another thing to consider is the amount of involvement from a facilitator while playing with the app. The student will probably need someone to set up the iPad and switch, even maybe open the game and turn on “switch control.” Will that be the end of the facilitator’s involvement in helping the student interact with the game? In my experience, the more you can let the student take complete control, the better. However, a little facilitator involvement isn’t a deal breaker.
For example, PBS Kids has an app called Play and Learn Science with a variety of activities. One of the activities allows the student to “put” objects in the water to see if they sink or float. With two switches, the student can make an object go into the water and take all of the objects out of the water. If the facilitator wants to, she can interact with the objects in the water to show the student how they react to different movements. Although the student has most of the control, the facilitator also has the opportunity to interact for added learning opportunities.
Setting Up the Switch
Once you have found the game and the way of interacting via switches, it’s time to set them up. First you will need a switch interface, Ablenet has a wired and wireless they sell, you can also create your own if you have the right parts lying around. The best source for setting up a switch is the instructions included in the interface. However, the following will work for most if not all of them. I’ve made a video here, or you can follow along:
- Make sure your switch interface is powered on and is connected
- Tap on the Settings Icon and go to General > Accessibility > Switch Control > Switches
- Click on “Add a New Switch” and Select External
- It will then ask you to activate the external switch.
- Once activated, a pop-up will allow you to name the switch
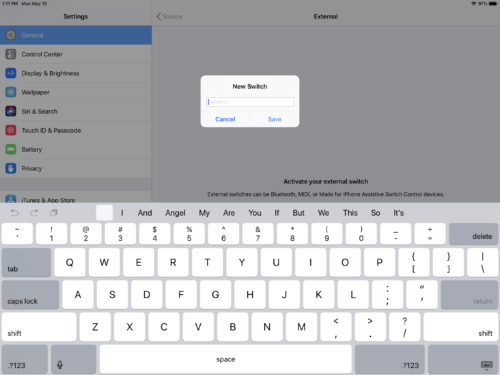
- It will then give you a choice of action for the switch. You can select anything here, as we will not be using the action, but creating a “custom gesture.”
That should be it! Keep in mind some switches might automatically connect.
Creating a Switch “Recipe” for the Game
Now that you have a switch set up, it’s time to adapt the game using a “switch recipe.” For this, we will use the app Rocket Flight, which I use for teaching the core word “up.” Here is a video I made on how to set it up, or you can follow along here. The game is simple, you press anywhere on the screen and it makes the rocket move up.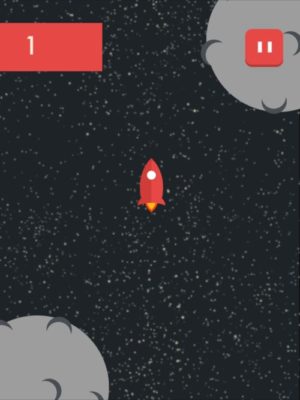
You have to continue to press it periodically, otherwise, it will fall to the bottom of the screen and crash. Also, you must time the presses, so you don’t crash into obstacles flying across the screen.
So let’s figure out our touch points. Well, we know that we can press anywhere on the screen to make the rocket go. As well, when we crash, we can replay the game by pressing a button near the middle of the screen. 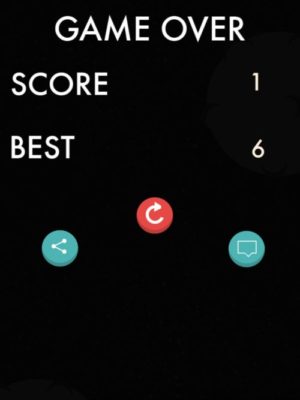
Taking these two together we know our touch point can be where the replay button is since it will make the rocket go and allow us to replay the game. That means we only need one switch to perform two functions! Pretty good deal!
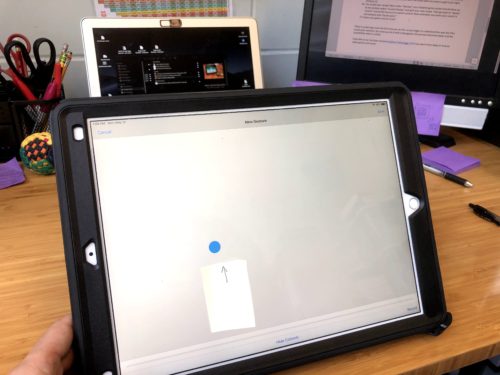
Once I know where the touch point is, I take a dry erase marker and put a little dot there. I also sometimes take a post-it note with an arrow and point it at that spot.
Now you can set up a recipe:
- Make sure your switch is powered on and is connected
- Tap on the Settings Icon and go to General > Accessibility > Switch Control > Recipes
- Press create a new recipe and then name it. Assign a switch to it (see above to install a switch!)
- Once you pick a switch, it will give you some options for “actions.” Select “custom gesture”
- Now just press on the area you marked with dry erase or with the post it. Then press stop. Press “play” a few times to make sure it’s in the right spot. If not, hit record and try again. You might have to mess around with the initial spot you press to get it just right.
- You made your recipe! Now under “Recipes” your adapted game recipe should show up. At the bottom select “Launch Recipe” and pick your new recipe. Then go back to “Switch Control” and at the top turn on switch control. Now, whenever you press your switch it will activate that “touch point.”
- Open your game and try it out!
There is a learning curve the first time you do this, as you begin to understand the way the iPad works with switches. But once you do it with a few games, the process becomes easier and the possibilities start to unfold.
Subscribe to my YouTube channel Assistive Technology ATX if you want more ideas on how to adapt games and more!
Relevant Resources
- PBS Kids Play and Learn Science
- AbleNet Blue2
- Creating an iPad Switch Interface Using Items Lying Around
- Setting Up AbleNet Blue2 Interface for iPad
- Rocket Flight Control
- Adapting iPad Games for Switch Use (Rocket Flight)
- Assistive Technology ATX

Filed under: Featured Posts, PrAACtical Thinking
Tagged With: access, Gaming, play, Switch Access
This post was written by Carole Zangari


1 Comment
Woo Hoo Daniel! Something else I am excited to try out. Thanks.